BLOG

How to switch your Pixieset website template

As your photography business changes and matures, it’s perfectly normal to fine-tune your website so it reflects these changes. However, there are times when slight adjustments are not enough. It may be because you’ve rebranded, changed markets, or simply because your website is long overdue for a refresh. Changing your website template can be the fastest way to achieve a brand new look.
Updating your website is a standard practice that any business should perform every 2-3 years. Nonetheless, this topic can be scary, as we’ve all heard stories that involve sleepless nights, months of work and stress over lost content. Luckily, with Pixieset updating your website is easy, fun and safe.
In today’s article learn about the things you need to know when switching between Pixieset templates. We’ve also prepared a step by step guide on how to safely switch between templates and update your site.
5 things to know when switching between Pixieset templates

#1 You can safely make and preview changes in draft mode
Pixieset’s website builder makes it easy and failproof to make and preview changes to your website. This also includes switching between templates. With the Draft Sites feature, you can explore a new template, make edits to fonts, colors, text and blocks, add new sections and pages — without worrying that this will affect your live website. While you can see all the changes inside your dashboard, they won’t show on your live site until you’re ready to click “Publish”. Take your time to safely experiment and refine the site design at your own pace, and publish the draft site to it swaps with the live site when you’re ready.
#2 You don’t experience any downtime
A website’s online availability is crucial, as it’s the place where clients come to check your portfolio, learn about you and your services, and eventually book you. Thankfully, there is no downtime when you switch between Pixieset templates. Your site is always accessible to your potential clients. Website visitors continue to see a published version of your website, even when you’re in the process of rebuilding it. This way, you don’t lose any client opportunities, even while working on making your business better.
#3 You can experiment with multiple templates at the same time
Ever find yourself torn between different website designs or wondering which one feels right for your brand? With Pixieset, you can experiment with up to 10 different templates at the same time, each as a separate draft site. Explore at your own pace all the fonts, colors, and layouts to find what best reflects your style.
#4 Your photos are always within reach
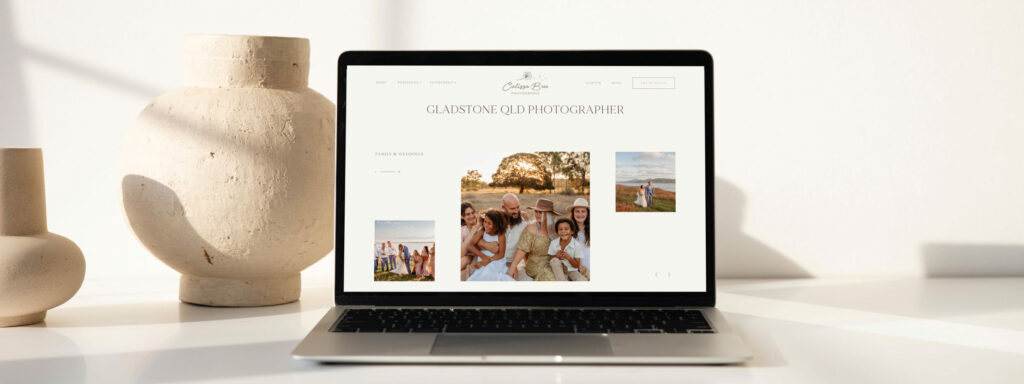
No matter how many draft sites you're playing with, your photography work is always on hand. Pixieset Website is fully connected to your Client Gallery, so you can easily pull images from your existing galleries into any page, while working on your site. All the images you add to your website will be stored in your site’s media library, so you can find and reuse them at any time.
#5 You can always switch back to a previous template
Changed your mind after going live with a new design? The process of switching between templates is easy and stress-free. When you publish a draft site, your previous live website is automatically saved in the Draft Sites tab, so you can always switch back if needed. Whether it’s a full revert or just revisiting sections you love, your past work is safely stored until you choose to delete it.
Note: When you go live with a new site, search engines like Google may need time to re-crawl your updated pages and show the new content in search results. To make the transition smoother, consider reusing the same URLs from your current site. Learn more about SEO here.
How to switch website templates
Now that you know what to expect when you change website templates with Pixieset, let’s go over a step by step guide on how to make the switch. Before starting out, we recommend to open your live site in a separate tab, so you can always refer to it while making edits in your dashboard and copy and paste anything you want to keep.
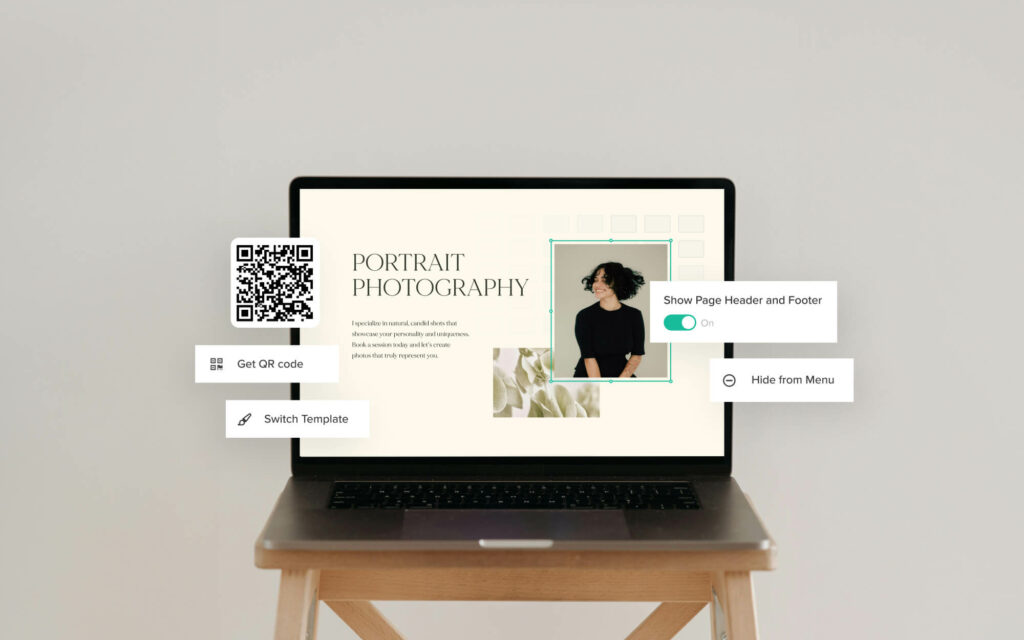
Step 1 - Pick a new template
Go to the Design tab (paintbrush icon) > click Try a New Template > Select Template. Once selected, a draft site will be automatically created for you. Now, you can explore and edit the new design without impacting your current live site or its content. You’ll find the draft site under Settings > Draft Sites, ready for you whenever you want to dive in.
Step 2 - Edit fonts and colors
If you’re happy with the template’s built-in fonts and colors, feel free to skip this step. But if you’d like to explore the styling options inside Pixieset Website and further customize your template — it’s a matter of a few clicks.
Go to Design tab > Fonts > All. Here, you can fine-tune your template’s typography, explore and apply the font packs from any other Pixieset template, or browse additional collections we’ve curated. With hundreds of fonts available, the font browser makes it easy to preview and test different options until you find the perfect match for your brand. Learn more about customizing fonts for your website.
Similarly, go to Design tab > Colors. You can adjust your template’s original color palette to better match your brand, apply palettes from other templates, or browse through dozens of color schemes we’ve put together. If you have specific brand colors, you can also create own your custom color palette and apply it across pages. Learn more about adding colors to your website.
Step 3 - Add your text and images
Go through each page in the template and start swapping in your content. Replace the images with your own, and update the text so it reflects your business and the way you like to communicate. Need to add more content? Just click on the “+” icon to add a new predefined block from the Pixieset Website library on any page. You’ll also have access to a built-in media library. That means all the images you’ve already uploaded to your site are always on hand ready to be reused whenever you need them.
Step 4 - Update your pages URLs, titles and descriptions
If you're switching to a new template, an easy way to keep your SEO in good shape is to use the same URLs (page links), page titles and descriptions on your draft site as your live one. The page title and description is what appears in search results and gives potential clients a glimpse of what your website is about. To update these, go to Settings > SEO Manager > Pages and make the changes. While you’re here, you can also review more SEO settings. Learn more about SEO here.
Step 5 - Add your portfolio galleries and blog posts
You can import all your existing blog posts to the new template with one click, so you don’t have to start from scratch. To start importing, click on +Add Page and choose Blog, then Import posts from live site. Or if you have a Blog page already added, click on the "..." next to it, and Import blog from live site. All the content will automatically carry over, and you can continue building on top of it.
For the galleries, to make this step easier, put together a simple document with the links to the galleries from your current site, along with details like publishing date, tags, and categories. Next, organize your images into separate folders so you can quickly find what you need for each gallery. If you use Pixieset’s Client Gallery, you can upload directly from your photo collections. Set aside time slots for adding your galleries, and do this process in batches to make steady progress without feeling overwhelmed.
Step 6 - Publish your new site
Once you’re happy with how your draft site looks in the dashboard preview, it’s time to hit the Publish button. This will update your live website with the new design, and automatically save the previous version under your Draft Sites tab, so you can always revisit or switch back if needed.
Launching a new site is an exciting milestone. We encourage you to celebrate it, share the update with friends, family, and on social media. Refreshing your website can be a great motivation and confidence boost as you get compliments from your community. You deserve to enjoy it to the fullest!
Ready to update your website?
We hope by the end of this article you feel confident and excited to go through a website update. Especially, when you know that Pixieset’s website builder makes it a fun and easy experience.
If you’re just starting out, follow these simple steps on how to create your first photography website. If you’re new to Pixieset, sign up with a free account and start exploring our website templates and all the amazing features our team has packed inside.

 Website